Setting Up Visual Studio for Unity
Visual Studio Code (VS Code) is a versatile code editor that supports a wide range of programming languages and frameworks. While it is not specific to Unity, it can be customized and extended to work effectively with Unity projects through the use of extensions and plugins.
STEP 1: Install Visual Studio Code: If you don't have Visual Studio Code installed, you should download and install it from the official website: code.visualstudio.com

STEP 2: Open Visual Studio Installer To Modify It For Unity:
a) Select Visual Studio Installer from desktop
OR
b) Open Any script from the unity and go to Tools>Get Tools and Features

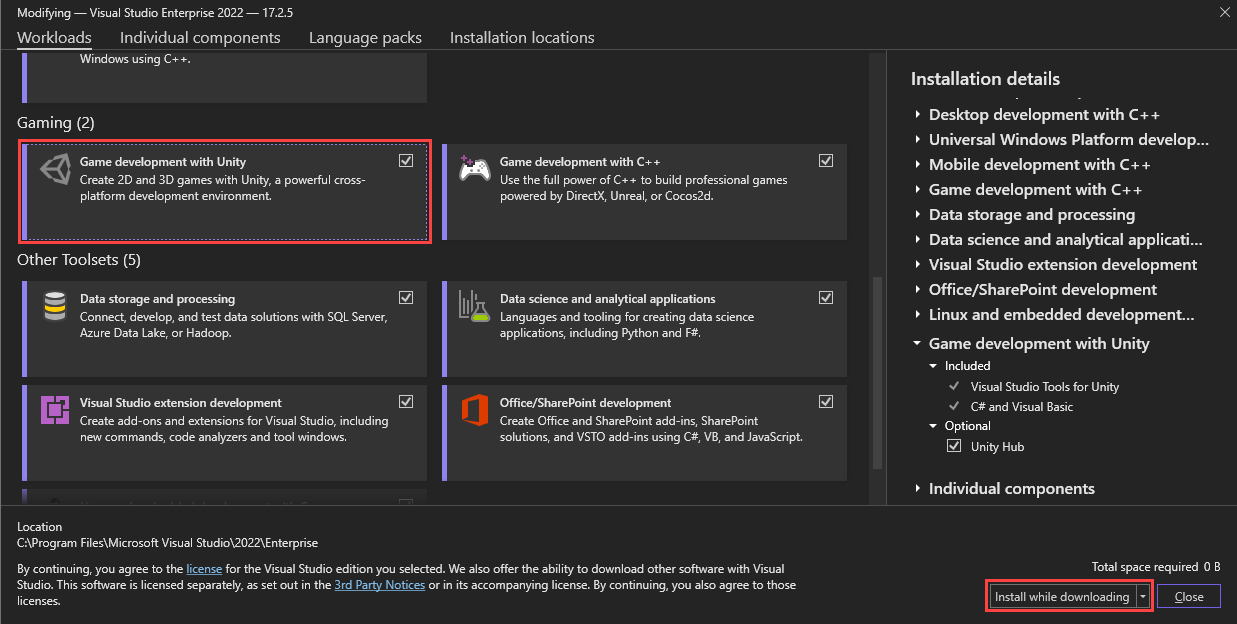
We need to select the desired Visual Studio Code Version and click on modify to modify the features.
Select the Workloads tab, then select the Game development with Unity workload.

STEP 3: Install the "C# Extension": To work effectively with Unity's C# scripting, you'll need to install the C# extension for Visual Studio Code. Here's how:
a. Open Visual Studio Code.
b. Go to the Extensions view by clicking on the square icon on the sidebar (or use the shortcut Ctrl+Shift+X or Cmd+Shift+X on macOS).
c. Search for "C# for Visual Studio Code" in the Extensions Marketplace.
d. Install the extension.
STEP 4: Install The Debugger For Unity: We’ll install the extension for debugging in Unity. This allows us to “attach” our code editor to Unity so that we can use the code editor to set up “breakpoints” in the code.
The exact name of the extension is “Debugger for Unity,” published by Unity Technologies.
STEP 5: Open Any Project From unity

STEP 6: To connect Unity Editor to Visual Studio Code, on Windows go to the ‘Edit’ > ‘Preferences’. On Mac, go to ‘Unity’ > ‘Preferences’.
You will see a screen with the title ‘preferences’. Next, Go to the “External Tools” menu, then select ‘Visual Studio Code on the ‘“External Script Editor” dropdown menu. If you don’t see ‘Visual Studio Code’ on this menu, just select the folder where you have installed Visual Studio Code.
Here we have successfully modified our Visual Studio Code for working in Unity.